


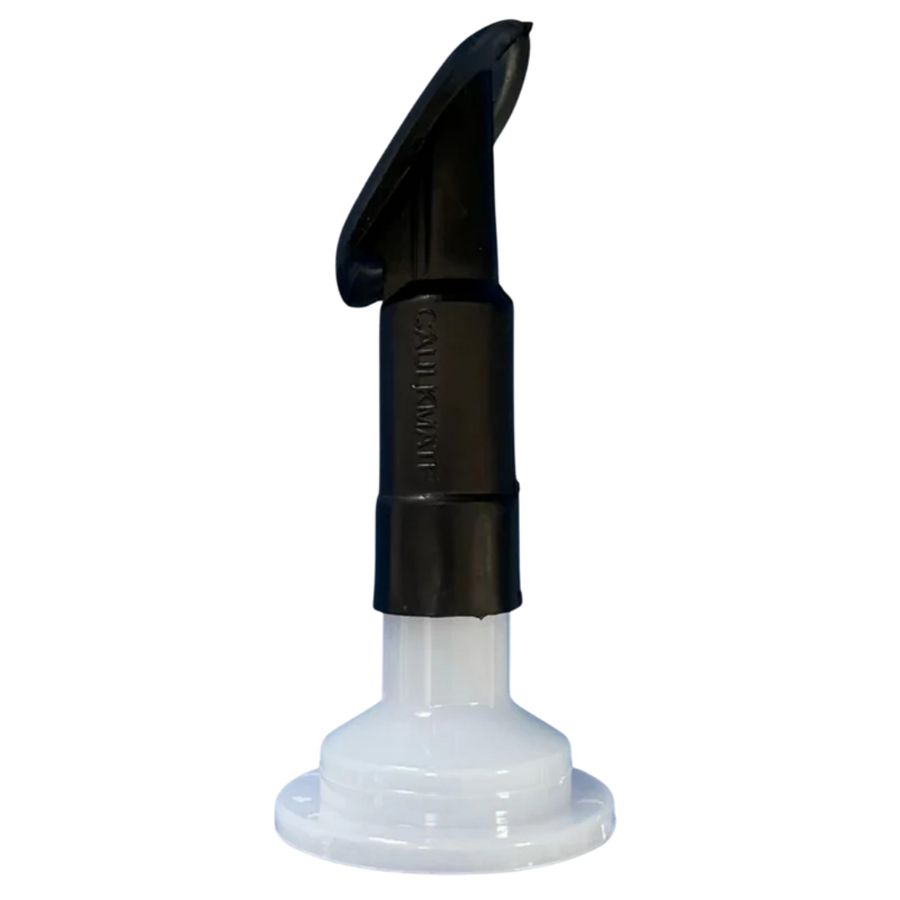
Caulkmate - 3 Pack
Three profiles that pull one clean silicone line and catch the excess. Fingers never touch the bead.
CaulkMate is a hand finishing tool for fresh silicone and caulk beads, sold as a 3 pack with three profiles. Lay the bead with any standard caulking gun, then drag the CaulkMate along it in one steady pass. No sealant is included.
What it's for
- Shower, bath and hob perimeters, sinks and basins
- Tile movement gaps, internal corners and floor to wall junctions
- Window, door, cladding and concrete expansion joints
Why waterproofers buy it
- Shaped edge pulls an even, repeatable profile in one pass
- Excess gathers on the tool, not on the tile
- Works with silicone and general caulk from any standard gun
- Reusable. Wipe it clean before the sealant cures
Specs
3 pack, three profiles. Bead widths and profile radii are not published, so call us if you need a size confirmed.
Not for
Cured or skinned beads. Not a caulking gun or gun attachment. Polyurethane and MS polymers should suit but are not confirmed on the product data.
or 4 interest-free payments of $4.50 with  · ex GST $16.36
Call (02) 8021 3517 before you order
Product Details
Technical Specifications
What's Included?
Product Files
No documentation available for this product.

Watch it working
A quick look at the three profiles, then a full bead run start to finish.
30 second overview
What the three heads do and which one to reach for.
Full bead, start to finish
Applying, tooling and cleaning up one internal corner.
Complete the setup
Lay the bead, then tool it clean. Add the gun and sealant you need and tick them in one go.
Lay the bead. Tool it. Done.
Run your bead with a standard caulking gun, then drag the CaulkMate along the wet sealant in one steady pass to shape a smooth, even profile while it captures the excess.
Remove any old or failed caulk, then clean and dry the joint so the fresh bead bonds properly.
Run a fresh, even bead of silicone or caulk along the joint with your standard caulking gun.
Drag the CaulkMate along the wet bead in one steady pass to shape a smooth, even profile. Excess gathers on the tool instead of smearing onto the surface.
Clear the collected excess off the tool between passes so every joint finishes with a clean line.
Look along the bead and re-tool any thin or wavy spots while the sealant is still fresh and workable.
Complete tooling while the sealant is still wet - do not rework it once it starts to skin or cure.
Wipe fresh sealant off the tool before it cures, then keep the pack ready for the next job.
Stop finishing silicone with your finger
A wet finger drags sealant out of the joint, smears it across the tile and leaves a bead that never sits the same twice. These three profiles pull one clean line and leave the rest of the joint alone.
Why it exists
Silicone is the last thing anyone sees and the first thing that gets judged. Finishing by hand takes sealant out of the joint, leaves a hollow bead and puts a film of silicone across the tile that shows up the moment the light hits it.
Where hand tooling goes wrong
Too much soapy water and the sealant will not bond. Too little and it drags. A finger changes shape every pass, so the bead runs thick in one spot and starves in the next, and the joint splits later where it went thin.
Why professionals use it
A fixed profile pulls the same bead the whole length of the joint, packs the sealant in rather than scraping it out, and leaves the tile clean so there is nothing to go back and fix.
Stop finishing beads with a wet finger
CaulkMate vs finishing by hand
Customer videos
Tilers and waterproofers using the CaulkMate on their own jobs.
Where it gets used
Any joint that has to be sealed, tooled and left clean.
-
Bathrooms
Showers, hobs, vanities and every internal corner that has to stay sealed.
-
Balconies
Door thresholds and perimeter joints that move and get weather.
-
Commercial kitchens
Splashbacks and floor to wall joints that get cleaned hard and often.
-
Laundries
Tubs, benches and floor wastes in tight spaces.
-
Apartments
Repeat layouts where every unit has to be finished the same.
-
Hospitals
Wet rooms and wards where the joint has to stay clean and sound.
-
Pool surrounds
Wet edges and coping joints that sit under water and sun.
-
Basements
Below ground joints where movement and moisture both show up.
This tool takes out
Check it suits your job
Two minutes here saves a return. CaulkMate is a hand finishing tool for shaping fresh silicone and caulk beads - you supply the sealant and the gun. Confirm your joints and sealant before you buy.
Built for every wet-area joint
Shape a neat, water-shedding bead where the base, hob or bath meets the tiled walls.
An even, watertight bead around basins, kitchen sinks and the benchtop-to-splashback junction.
Tidy internal reveals and external weather joints around window and door surrounds.
Clean, weather-tight exterior joint lines across siding, cladding and trim.
Movement gaps, internal corners and floor-to-wall junctions where grout would otherwise crack.
A uniform, profiled sealant finish across concrete expansion and movement joints.
Frequently asked questions
-
Is this a sealant or a tool?
It is a tool. The 3-pack is a set of CaulkMate caulking finishing tools that help you apply and smooth silicone and caulk. No sealant is included - you supply your own.
-
What's in the 3-pack?
It is sold as a 3-pack of CaulkMate caulking finishing tools. If you need the exact breakdown of the pack confirmed before you buy, give us a call and we will check it with the supplier.
-
What sealants does it work with?
It is designed for silicone and general caulk. It should also suit other gun-applied wet sealants like polyurethane and MS polymers, though that is not confirmed on the product data - call us if you need certainty for a specific product.
-
Does it fit my caulking gun?
It is a finishing tool used alongside your sealant, not a gun or a gun attachment. You lay the bead with any standard caulking gun, then shape it with the CaulkMate while the sealant is still wet.
-
Is it reusable?
Yes. It is a hand tool built for repeat use, not a single-use throwaway. Wipe it down after each job and keep it for the next one.
-
How do I clean it?
Wipe or wash off fresh sealant before it cures. Cleaning it straight after use gives the best result and keeps it ready for the next bead.
-
Does it work on internal and external joints?
Yes. It suits interior wet areas like showers, baths, sinks and kitchens, and exterior work around windows, doors, siding, trim and concrete joints.
-
Can I use it on caulk that's already dry?
No. It is for tooling fresh, uncured beads - smooth the sealant while it is still wet, before it skins. It will not reshape caulk that has already cured.
-
What bead widths does it handle?
It shapes standard household and trade joint widths for showers, sinks, windows and concrete gaps. Exact bead widths and profile radii are not published, so call us if you need a specific size confirmed.
-
Is it for DIY or trade?
Both. The no-mess design and consistent profile make a clean bead achievable for DIYers, while trade users get through repetitive caulking faster with less rework.
Not sure it suits your job?
Call the team before ordering and we will talk through your joints, sealant and the finish you need. Specialist waterproofing supplier - not a general hardware store.
Ready for a cleaner finish?
Need a hand choosing a profile? Call the team and talk it through.